
Node-RED 在[1]官方網站Cookbook 之中,將它整個系統分為下列幾個區塊的基礎課課,進行討論,本篇針對Messages 訊息處理進行讀後心得分享。
- Messages
- Flow control
- Error handling
- HTTP Endpoint
- HTTP requests
- MQTT
試用一下,即然Node-RED的操作功能是用web 方式來進行的,那是不是可以新增一頁來放網頁資料,並且做與Node-RED流程的輸入及輸出介面之一,舉例說明:假設我將Raspberry Pi 3安裝好Node-RED (己有HTTP Endpoint)那我何須再另外再寫再開一個http 的服務或Linux API 或Console 來狀態做即時的展示出來呢?
本篇即是再探討關於網頁服務功能,應用在Node-RED是要如何進行的,在網頁服務功能(HTTP Endpoint) 說明,分成下列幾類進行說明:
- 創建一個HTTP服務端點 (Create an HTTP Endpoint)
- 傳遞給HTTP端點使用查詢參數方式(Handle query parameters passed to an HTTP endpoint)
- 處理HTTP端點使用URL參數方式(Handle url parameters in an HTTP endpoint)
- 存取HTTP請求標頭設計(Access HTTP request headers)
- 從另一個流程控制中抓數數據(Include data captured in another flow)
- 提供JSON內容(Serve JSON content)
- 提供本地文件(Serve a local file)
- 將原始數據發佈到流程(Post raw data to a flow)
- 將表單數據發佈到流程(Post form data to a flow)
- 將JSON數據發佈到流程(Post JSON data to a flow)
- cookie應用範例(Work with cookies)
1.創建一個HTTP服務端點 (Create an HTTP Endpoint)
如同Hello World !!的第101課程一樣,如何開啟網頁並秀出Hello World !! 即是本章節要引導大家來進行的,假設我的Node-RED 服務的電腦的IP 為 192.168.1.104,所以我可以用http://192.168.1.104:1880/ 來開啟Node-RED 編輯器,若我想要在下面的網址上秀Hello World !! 要怎麼做呢?
http://192.168.1.104:1880/hello
如下圖1,先拉一個Input->http,後面再接一個function->template,最後再接一個output->http response 。

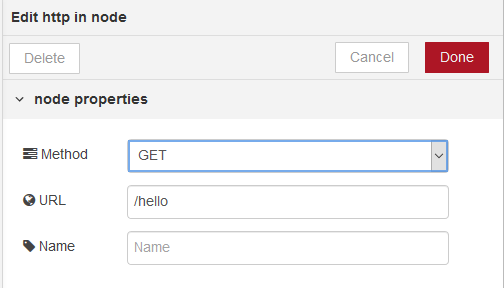
如下圖2,將Input->http 點2下開啟,將URL 填hello ( 因為我們目標是 http://192.168.1.104:1880/hello ,如果你網址後面要是ooxx ,記得要改URL的文字喲。
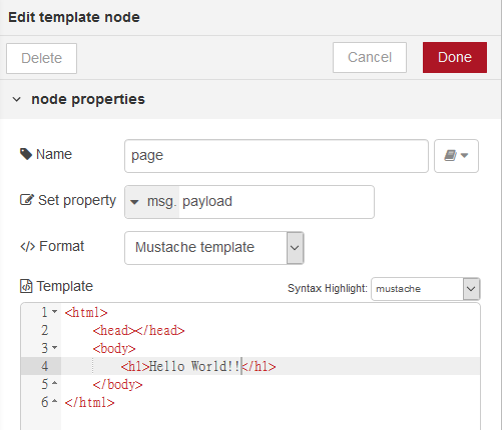
如下圖3,在function->template 上面點2下開啟,在Template 裏面填寫HTML5 的網頁語法。
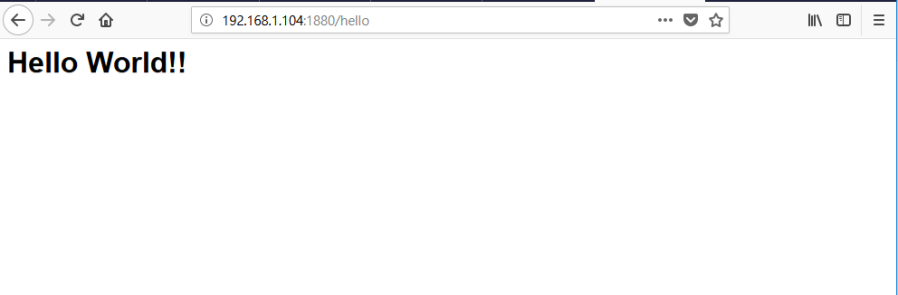
最後按下Deploy 後,如下圖在瀏覽器開啟新頁輸入 http://192.168.1.104:1880/hello 即可會出現下面的畫面。
| 範例程式碼:Node-RED的json code , 請在Node-RED編輯畫面上按[Ctrl]+[I]將json 碼貼上即可 |
| [{“id":"2fb4c941.7b44e6″,"type":"http in","z":"ddb34c49.89684″,"name":"","url":"/hello","method":"get","upload":false,"swaggerDoc":"","x":180,"y":220,"wires":[[“40559a3f.1ca6d4″]]},{“id":"40559a3f.1ca6d4″,"type":"template","z":"ddb34c49.89684″,"name":"page","field":"payload","fieldType":"msg","format":"handlebars","syntax":"mustache","template":"<html>\n <head></head>\n <body>\n <h1>Hello World!!</h1>\n </body>\n</html>","x":330,"y":220,"wires":[[“f22db627.b84f2″]]},{“id":"f22db627.b84f2″,"type":"http response","z":"ddb34c49.89684″,"name":"","statusCode":"","headers":{},"x":470,"y":220,"wires":[]}] |
2.傳遞給HTTP端點使用查詢參數方式(Handle query parameters passed to an HTTP endpoint)
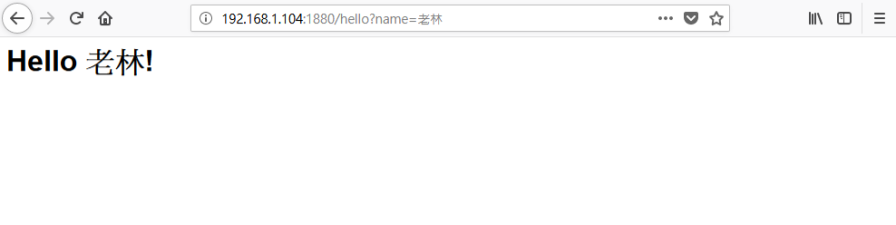
html前端設計也可以跟PHP或ASP等網頁程式語言一樣,用網址加個?帶入參數或資料方式進行,這種方式英文叫Handle 在Node-RED引入參數是req.query來進行,假設我的Node-RED的URL是(192.168.1.104:1880),如下圖例如:想要在網頁上出現Hello 老林!!,設計網址為 http://192.168.1.104:1880/hello?name=老林,那要怎麼進行呢? 這次開始就不教如何一個一個節點拉了,直接複製程式碼比較快,如下:
| 範例程式碼:Node-RED的json code , 請在Node-RED編輯畫面上按[Ctrl]+[I]將json 碼貼上即可 |
| [{“id":"a205d69d.7705c8″,"type":"template","z":"ddb34c49.89684″,"name":"page","field":"payload","fieldType":"msg","format":"handlebars","syntax":"mustache","template":"<html>\n <head></head>\n <body>\n <h1><font color={{req.query.colour}}>Hello {{req.query.name}}!</font></h1>\n \n </body>\n</html>","x":470,"y":280,"wires":[[“4257a311.23895c"]]},{“id":"51ec85ab.bc3ec4″,"type":"http in","z":"ddb34c49.89684″,"name":"","url":"/hello","method":"get","upload":false,"swaggerDoc":"","x":280,"y":280,"wires":[[“a205d69d.7705c8″]]},{“id":"4257a311.23895c","type":"http response","z":"ddb34c49.89684″,"name":"","statusCode":"","headers":{},"x":610,"y":280,"wires":[]}] |
執行結果如下:
觀察 function->template 可以發現,只是多了一個引數{{req.query.name}} ,其中req.query 是必備的,.name 是由URL帶入的變數名稱,例如想要改變Hello 老林!成不同的顏色,在function ->template 裏的HTML的寫法如上面的範例程式碼,其中colour 是給CSS帶入顏色用途的地方,如下範例要將Hello 老林!涂成藍色多了一個req.query.colour 的引數載入到html裏的<font color=req.query.colour> 在網址也要跟著改成如下網址,結果就出來了..^^
http://192.168.1.104:1880/hello?name=老林&colour=blue

3.處理HTTP端點使用URL參數方式(Handle url parameters in an HTTP endpoint)
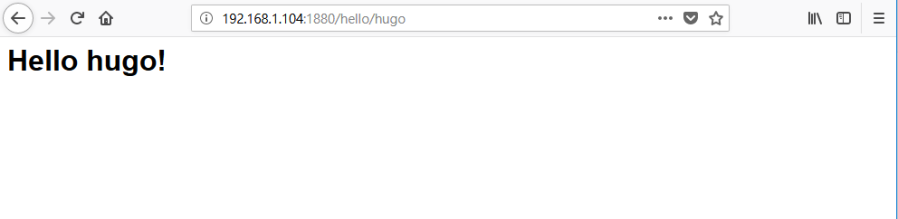
假設想要用的URL 不要用URL+ ?來引入資料,而是要用參數(parameters )方式呢?為什麼要用Parameters 呢? 舉個例子 http://192.168.1.104:1880/hello/hugo 如果出現的URL是這樣,看起來像不像是給專屬網址的味道,而己看不出來是一個網頁目錄或只是給一個參數方式,參數是用req.params.name來帶入HTML5的前端設計之中的,很帥吧!!範例程式碼如下:
| 範例程式碼:Node-RED的json code , 請在Node-RED編輯畫面上按[Ctrl]+[I]將json 碼貼上即可 |
| [{“id":"28adafa0.7e738″,"type":"http response","z":"ddb34c49.89684″,"name":"","x":590,"y":240,"wires":[]},{“id":"45a5e1f3.589888″,"type":"template","z":"ddb34c49.89684″,"name":"page","field":"payload","fieldType":"msg","format":"handlebars","syntax":"mustache","template":"<html>\n <head></head>\n <body>\n <h1>Hello {{req.params.name}}!</h1>\n </body>\n</html>","x":450,"y":240,"wires":[[“28adafa0.7e738″]]},{“id":"cd5b7bbd.3f4c7″,"type":"http in","z":"ddb34c49.89684″,"name":"","url":"/hello/:name","method":"get","upload":false,"swaggerDoc":"","x":220,"y":240,"wires":[[“45a5e1f3.589888″]]}] |
在網頁上輸入網址http://192.168.1.104:1880/hello/hugo 結果如下:
4.存取HTTP請求標頭設計(Access HTTP request headers)
如果要取得前端的環境回到Node-RED 的網頁服務引入參數要怎麼做呢? 只需要呼叫 msg.req.headers 這個Node-RED function template 節點參數節可,範例程式碼如下:
| Node-RED的json code , 請在Node-RED編輯畫面上按[Ctrl]+[I]將json 碼貼上即可 |
| [{“id":"5e3bf6ab.bbefd8″,"type":"http in","z":"ddb34c49.89684″,"name":"","url":"/hello","method":"get","upload":false,"swaggerDoc":"","x":220,"y":280,"wires":[[“97984864.a68a5″]]},{“id":"97984864.a68a5″,"type":"template","z":"ddb34c49.89684″,"name":"page","field":"payload","fieldType":"msg","format":"handlebars","syntax":"mustache","template":"<html>\n <head></head>\n <body>\n <h1>User agent: {{req.headers.user-agent}}</h1>\n </body>\n</html>","x":430,"y":280,"wires":[[“838d4783.d06a68″]]},{“id":"838d4783.d06a68″,"type":"http response","z":"ddb34c49.89684″,"name":"","statusCode":"","headers":{},"x":570,"y":280,"wires":[]}] |
以我的Notebook Windows 10在Firefox 執行的結果如下:
http://192.168.1.104:1880/hello

5.從另一個流程控制中抓數數據(Include data captured in another flow)
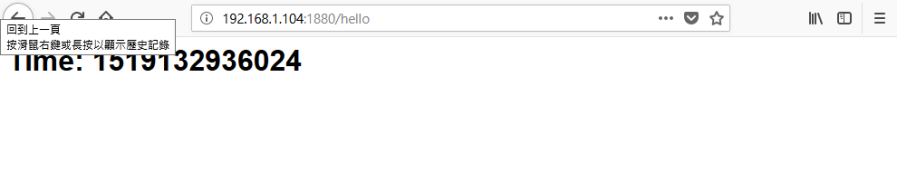
Node-RED 的流程控制之中,目前學習到的都是單一輸入,不管是input->http 或input->inject 若需要由input->inject 輸入到網頁時,怎麼辦呢? 注意看哦 input 左邊沒有接節點的缺口,所以無法將2者之間串在一起哦,所以要用其它方式,以本範例來說明好了,設計之中想要將每秒的時間戳記秀在網頁上面,要如何進行呢,如下範例程式碼所示:
| 範例程式碼:Node-RED的json code , 請在Node-RED編輯畫面上按[Ctrl]+[I]將json 碼貼上即可 |
| [{“id":"ba353786.6f2e","type":"inject","z":"ddb34c49.89684″,"name":"","topic":"","payload":"","payloadType":"date","repeat":"1″,"crontab":"","once":true,"x":270,"y":200,"wires":[[“90305e57.54a57″]]},{“id":"90305e57.54a57″,"type":"change","z":"ddb34c49.89684″,"name":"Store time","rules":[{“t":"set","p":"timestamp","pt":"flow","to":"payload","tot":"msg"}],"action":"","property":"","from":"","to":"","reg":false,"x":430,"y":200,"wires":[[]]},{“id":"148acb0e.ae11fd","type":"http in","z":"ddb34c49.89684″,"name":"","url":"/hello","method":"get","upload":false,"swaggerDoc":"","x":260,"y":240,"wires":[[“329bece7.cf289c"]]},{“id":"329bece7.cf289c","type":"change","z":"ddb34c49.89684″,"name":"Copy time","rules":[{“t":"set","p":"timestamp","pt":"msg","to":"timestamp","tot":"flow"}],"action":"","property":"","from":"","to":"","reg":false,"x":470,"y":240,"wires":[[“9597f88d.cd6e5″]]},{“id":"9597f88d.cd6e5″,"type":"template","z":"ddb34c49.89684″,"name":"page","field":"payload","fieldType":"msg","format":"handlebars","syntax":"mustache","template":"<html>\n <head>\n <meta http-equiv=\"refresh\" content=\"1\">\n </head>\n <body>\n <h1>Time: {{ timestamp }}</h1>\n </body>\n</html>","x":630,"y":240,"wires":[[“c90e3892.7699d8″]]},{“id":"c90e3892.7699d8″,"type":"http response","z":"ddb34c49.89684″,"name":"","x":770,"y":240,"wires":[]}] |
在input-> inject 要改每秒定期觸發,並將資料存入,這裏也不用新的元件就是用function->change ,並且用set 的指令,將flow.timestamp 儲入 msg.pyload 之中,再另一個流程之中再用function->change 反向將msg.pyload 儲到這個流程的 flow.timestamp 之中,即可用HTML5 大刮號 {timestamp}帶入引數。
本範例為了要讓網頁定期更新,多加了一個 <meta http-equiv="refresh" content="1″> HTML標籤在<head>之間,整個HTML的內容,匯入節點後點function->template 就有完整的程式碼了,執行的結果如下,每秒會不斷的刷新時間戳紀。
6.提供JSON內容(Serve JSON content)
如下範例程式嗎 , 用function->template 帶入json { “Hello": “World" } 資料,但我將function ->exchange 拿掉後結果依然相同,所以個方例的用法,我還沒有參透哦,如果有先進懂其中的差別麻煩跟我說明一下,不勝感激。
| 範例程式碼:Node-RED的json code , 請在Node-RED編輯畫面上按[Ctrl]+[I]將json 碼貼上即可 |
| [{“id":"350006bb.88784a","type":"http in","z":"ddb34c49.89684″,"name":"","url":"/hello","method":"get","upload":false,"swaggerDoc":"","x":200,"y":220,"wires":[[“d84af228.dafa6″]]},{“id":"d84af228.dafa6″,"type":"template","z":"ddb34c49.89684″,"name":"page","field":"payload","fieldType":"msg","format":"handlebars","syntax":"mustache","template":"{ \"Hello\": \"World\" }","x":390,"y":220,"wires":[[“7801fad.7f6e284″]]},{“id":"7801fad.7f6e284″,"type":"change","z":"ddb34c49.89684″,"name":"Set Headers","rules":[{“t":"set","p":"headers","pt":"msg","to":"{}","tot":"json"},{“t":"set","p":"headers.content-type","pt":"msg","to":"application/json","tot":"str"}],"action":"","property":"","from":"","to":"","reg":false,"x":550,"y":220,"wires":[[“2bee75f3.a0274a"]]},{“id":"2bee75f3.a0274a","type":"http response","z":"ddb34c49.89684″,"name":"","x":710,"y":220,"wires":[]}] |
7.提供本地文件(Serve a local file)
如果Node-RED服務是在數莓派,應用其它程式將相片放入\tmp\node-red.png 之中,Node-REd 如何將這相片從儲存空間之中取出並顯示在網頁上,這會用到Storage ->file in的節點,範例程式碼如下。
| 範例程式碼:Node-RED的json code , 請在Node-RED編輯畫面上按[Ctrl]+[I]將json 碼貼上即可 |
| [{“id":"45e40749.d41978″,"type":"http in","z":"ddb34c49.89684″,"name":"","url":"/hello","method":"get","upload":false,"swaggerDoc":"","x":260,"y":220,"wires":[[“60c7ffae.1657f8″]]},{“id":"60c7ffae.1657f8″,"type":"file in","z":"ddb34c49.89684″,"name":"","filename":"/tmp/node-red.png","format":"","sendError":true,"x":450,"y":220,"wires":[[“b571bba0.597878″]]},{“id":"b571bba0.597878″,"type":"change","z":"ddb34c49.89684″,"name":"Set Headers","rules":[{“t":"set","p":"headers","pt":"msg","to":"{}","tot":"json"},{“t":"set","p":"headers.content-type","pt":"msg","to":"image/png","tot":"str"}],"action":"","property":"","from":"","to":"","reg":false,"x":630,"y":220,"wires":[[“1ca65b9c.96b4e4″]]},{“id":"1ca65b9c.96b4e4″,"type":"http response","z":"ddb34c49.89684″,"name":"","x":770,"y":220,"wires":[]}] |
8.將原始數據發佈到流程(Post raw data to a flow)
之前的範例都是Get 的服務,如果是用Post 來進行呢?如下說明,如何將資料丟到其它URL上去的方式,這時候URL應該不是指本機Node-RED的網址。
| 範例程式碼:Node-RED的json code , 請在Node-RED編輯畫面上按[Ctrl]+[I]將json 碼貼上即可 |
| [{“id":"a45455db.0a64″,"type":"http in","z":"ddb34c49.89684″,"name":"","url":"/hello","method":"post","upload":true,"swaggerDoc":"","x":230,"y":260,"wires":[[“1b1adc4a.c0c2b4″]]},{“id":"1b1adc4a.c0c2b4″,"type":"template","z":"ddb34c49.89684″,"name":"page","field":"payload","fieldType":"msg","format":"handlebars","syntax":"mustache","template":"<html>\n <head></head>\n <body>\n <h1>Hello {{ payload }}!</h1>\n </body>\n</html>","x":410,"y":260,"wires":[[“e50a5101.2117d8″]]},{“id":"e50a5101.2117d8″,"type":"http response","z":"ddb34c49.89684″,"name":"","statusCode":"","headers":{},"x":550,"y":260,"wires":[]}] |
9.將表單數據發佈到流程(Post form data to a flow)
| 範例程式碼:Node-RED的json code , 請在Node-RED編輯畫面上按[Ctrl]+[I]將json 碼貼上即可 |
| [{“id":"d3e11324.5427e","type":"http in","z":"ddb34c49.89684″,"name":"","url":"/hello","method":"post","upload":true,"swaggerDoc":"","x":70,"y":180,"wires":[[“c6ca2ebe.ce74c"]]},{“id":"c6ca2ebe.ce74c","type":"template","z":"ddb34c49.89684″,"name":"page","field":"payload","fieldType":"msg","format":"handlebars","syntax":"mustache","template":"<html>\n <head></head>\n <body>\n <h1>Hello {{ payload.name }}!</h1>\n </body>\n</html>","x":250,"y":180,"wires":[[“cd37d892.038a18″]]},{“id":"cd37d892.038a18″,"type":"http response","z":"ddb34c49.89684″,"name":"","x":390,"y":180,"wires":[]}] |
10.將JSON數據發佈到流程(Post JSON data to a flow)
| 範例程式碼:Node-RED的json code , 請在Node-RED編輯畫面上按[Ctrl]+[I]將json 碼貼上即可 |
| [{“id":"bf5a3327.65cf78″,"type":"http in","z":"ddb34c49.89684″,"name":"","url":"/hello","method":"post","upload":false,"swaggerDoc":"","x":350,"y":260,"wires":[[“36788f81.ae79a"]]},{“id":"36788f81.ae79a","type":"template","z":"ddb34c49.89684″,"name":"page","field":"payload","fieldType":"msg","format":"handlebars","syntax":"mustache","template":"<html>\n <head></head>\n <body>\n <h1>Hello {{ payload.name }}!</h1>\n </body>\n</html>","x":530,"y":260,"wires":[[“720593a7.82addc"]]},{“id":"720593a7.82addc","type":"http response","z":"ddb34c49.89684″,"name":"","statusCode":"","headers":{},"x":670,"y":260,"wires":[]}] |
11.cookie應用範例(Work with cookies)
| 範例程式碼:Node-RED的json code , 請在Node-RED編輯畫面上按[Ctrl]+[I]將json 碼貼上即可 |
| [{“id":"c362b989.954ae8″,"type":"http in","z":"3045204d.cfbae","name":"","url":"/hello-cookie","method":"get","swaggerDoc":"","x":130,"y":1020,"wires":[[“21ddf71f.d00518″]]},{“id":"21ddf71f.d00518″,"type":"function","z":"3045204d.cfbae","name":"Format cookies","func":"msg.payload = JSON.stringify(msg.req.cookies,null,4);\nreturn msg;","outputs":1,"noerr":0,"x":340,"y":1020,"wires":[[“f3aa98c1.befc18″]]},{“id":"f3aa98c1.befc18″,"type":"template","z":"3045204d.cfbae","name":"page","field":"payload","fieldType":"msg","format":"handlebars","syntax":"mustache","template":"<html>\n <head></head>\n <body>\n <h1>Cookies</h1>\n <p></p><a href=\"hello-cookie/add\">Add a cookie</a> • <a href=\"hello-cookie/clear\">Clear cookies</a></p>\n <pre>{{ payload }}</pre>\n </body>\n</html>","x":530,"y":1020,"wires":[[“f52e2880.180968″]]},{“id":"f52e2880.180968″,"type":"http response","z":"3045204d.cfbae","name":"","x":750,"y":1020,"wires":[]},{“id":"9a2a9a4.0fc0768″,"type":"change","z":"3045204d.cfbae","name":"Redirect to /hello-cookie","rules":[{“t":"set","p":"statusCode","pt":"msg","to":"302″,"tot":"num"},{“t":"set","p":"headers","pt":"msg","to":"{}","tot":"json"},{“t":"set","p":"headers.location","pt":"msg","to":"/hello-cookie","tot":"str"}],"action":"","property":"","from":"","to":"","reg":false,"x":550,"y":1080,"wires":[[“f52e2880.180968″]]},{“id":"afefb90.53dcf48″,"type":"function","z":"3045204d.cfbae","name":"Add a cookie","func":"msg.cookies = { };\nmsg.cookies[\"demo-\"+(Math.floor(Math.random()*1000))] = Date.now();\nreturn msg;","outputs":1,"noerr":0,"x":330,"y":1060,"wires":[[“9a2a9a4.0fc0768″]]},{“id":"d5205a2c.db9018″,"type":"function","z":"3045204d.cfbae","name":"Clear cookies","func":"// Find demo cookies and clear them\nvar cookieNames = Object.keys(msg.req.cookies).filter(function(cookieName) { return /^demo-/.test(cookieName);});\nmsg.cookies = {};\n\ncookieNames.forEach(function(cookieName) {\n msg.cookies[cookieName] = null;\n});\n\nreturn msg;","outputs":1,"noerr":0,"x":340,"y":1100,"wires":[[“9a2a9a4.0fc0768″]]},{“id":"fda60c66.04975″,"type":"http in","z":"3045204d.cfbae","name":"","url":"/hello-cookie/add","method":"get","swaggerDoc":"","x":140,"y":1060,"wires":[[“afefb90.53dcf48″]]},{“id":"35285a76.1f8636″,"type":"http in","z":"3045204d.cfbae","name":"","url":"/hello-cookie/clear","method":"get","swaggerDoc":"","x":140,"y":1100,"wires":[[“d5205a2c.db9018″]]}] |
